Trézor.io/start – Secure Setup Guide for Your Trézor Hardware
Trézor.io/Start – Secure Setup Guide for Your Trézor Hardware Wallet 🔐✨
Setting up a hardware wallet is one of the most important steps you’ll ever take in protecting your digital assets. Your cryptocurrencies—whether Bitcoin, Ethereum, or altcoins—deserve the best level of security. A hardware wallet like Trezor gives you peace of mind by keeping your private keys offline, inaccessible to hackers, malware, and phishing attempts. This comprehensive guide will walk you through the entire setup process as if you were following the instructions from Trézor.io/start, but rewritten in a clean, simpler, and friendlier way, packed with helpful explanations and tips. Let’s begin your journey to stronger crypto protection! 🚀💼
Why a Hardware Wallet Matters So Much 🛡️
Digital money brings freedom, but it also brings risk. If your coins are stored on an exchange or an online wallet, your keys are not truly yours. A single hack or breach could wipe your holdings. A hardware wallet fixes this by giving you full control.
Here’s why people prefer hardware wallets:
- ⭐ Offline protection: Your keys never touch the internet
- ⭐ Resistant to malware: Computer viruses can’t steal what they can’t reach
- ⭐ Protection from phishing: Physical confirmation is always needed
- ⭐ Backups through recovery phrases: Even if the device gets lost, you can recover funds
- ⭐ Open-source security: Transparent code ensures trust
Whether you’re new to crypto or a seasoned investor, securing your assets with Trezor is a smart long-term decision.
Unboxing Your Trezor Device 🎁
Before you begin the setup, take a moment to inspect your product. Hardware wallets must be tamper-proof. Here’s what you should look for:
- 🔍 Check that the box is sealed
- 🔍 Ensure the hologram or protective stickers are undamaged
- 🔍 Look for any signs of forced opening
- 🔍 Verify the device doesn’t appear scratched or altered
Inside the box, you'll find:
- 🖥️ Your Trezor hardware wallet
- 🔌 USB cable
- 📝 Recovery seed cards
- 📖 Basic instruction card
- 🧲 Stickers or accessories depending on the model
If anything looks unusual, do not proceed—contact customer support.
Getting Started the Right Way 🧭
To set up your Trezor for the first time, the official instructions normally direct you to the setup portal. Follow the steps below to smoothly initialize and secure your device.
1. Connect Your Trezor to Your Computer 💻🔗
Use the USB cable provided. Once you plug the device in, the Trezor screen will light up with a welcome message. You may be prompted to visit a setup interface on your computer. If you’re doing this the first time, be certain you’re using your own computer—not a public one.
Security tips:
- 🔒 Never use unknown USB cables
- 🔒 Avoid connecting through public or shared computers
- 🔒 Make sure your system is free from malware
Your device will display a note reminding you to complete setup through the appropriate software.
2. Install the Trezor Software Application 🛠️
To manage your crypto wallet, you’ll need to install the companion software. Depending on your operating system, this app enables communication between the Trezor device and your computer.
The software helps in:
- 🪙 Managing coins
- 📤 Sending and receiving crypto
- 🔑 Viewing your public keys
- 🔧 Updating device firmware
- 🔐 Initializing your hardware wallet securely
Once installed, open it and proceed to the next step.
3. Update Firmware (If Required) ⚙️⬆️
Your device may prompt you to update the firmware. Firmware is the internal software that makes the wallet function securely.
Updating firmware:
- 🛡️ Ensures the latest security patches
- 🧩 Adds support for new cryptocurrencies
- 🚀 Improves performance
During the update, do not disconnect your device. Once complete, the screen will prompt you to restart or continue setup.
4. Create a New Wallet 🪙🔐
With your device now ready, choose the option to create a new wallet. This is your cryptographic identity, and the device will generate your private keys offline.
Your Trezor never reveals private keys to your computer. This is its most important job.
Once you confirm creating a new wallet, you’re ready for the most critical part: your recovery seed.
5. Your Recovery Seed – The Heart of Your Wallet 🌱🔑
When your wallet is created, your Trezor will generate a Recovery Seed, typically 12, 18, or 24 words long. These words appear on the Trezor’s screen.
⚠️ This phrase is the ONLY way to recover your wallet if the device is lost, stolen, or damaged.
Rules for protecting your recovery seed:
- 📝 Write the words exactly as shown
- 🧾 Use the included recovery card to store them offline
- 🧊 Never store seed words digitally
- 📸 Never take a photo
- ☁️ Never upload to cloud storage
- 🤫 Never share with anyone
- 🔐 Consider using a fireproof safe
Anyone who gets access to the seed gets access to your funds.
This step is non-negotiable: take your time and safeguard the seed phrase.
6. Confirm Your Recovery Phrase ✍️🔁
Your device will ask you to verify that you wrote your seed correctly. It may do this by asking you to confirm certain words in the sequence. This ensures your backup is accurate.
Only after correct confirmation will the device allow you to continue.
7. Set Up a PIN for Extra Security 🔢🛡️
The device will prompt you to choose a PIN. This PIN protects your wallet from unauthorized physical access. Choose a PIN that is:
- 🔐 Not simple (avoid 1111, 1234, birthdays)
- 🔐 Long enough to prevent guessing
- 🔐 Not used anywhere else
The Trezor screen guides you through secure PIN entry. Even if your device is stolen, the PIN helps keep your crypto protected.
8. Explore the Wallet Dashboard 📊🌐
Once setup is complete, the app will display your dashboard. Here you can perform key operations:
- 🪙 Add coins
- 📥 Generate receive addresses
- 📤 Send transactions
- 💱 View balances
- 🧩 Manage tokens depending on the chain
- 🔧 Adjust advanced settings
Your wallet is now live and ready.
Adding Cryptocurrencies to Your Wallet 💰➡️🔐
You can receive crypto into your Trezor wallet from exchanges, friends, or other sources. To receive:
- Open the token or coin you want to receive
- Click “Receive”
- View the displayed address
- Verify the address on your Trezor screen (never skip this step)
- Share the address with the sender or paste it into the withdrawal section of an exchange
Always confirm the address displayed on the computer matches what appears on your Trezor screen. This protects you from clipboard-hijacking malware.
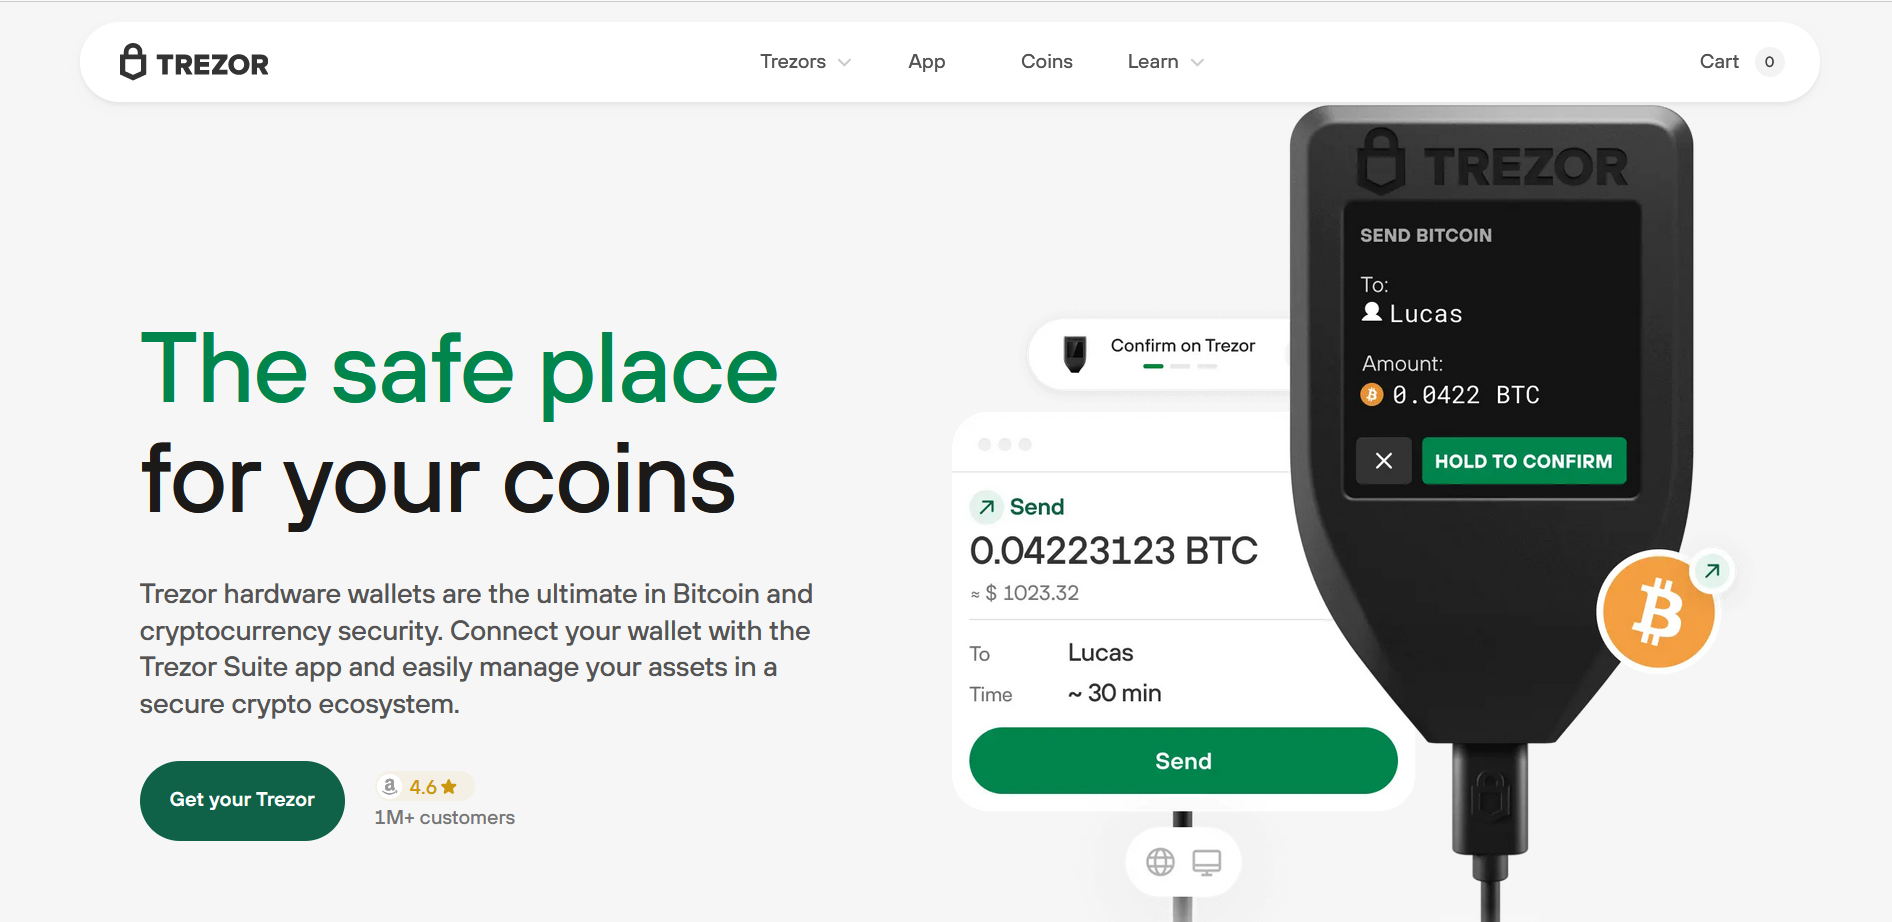
Sending Cryptocurrency Safely 📤⚡
When sending crypto:
- Enter the destination address
- Choose an amount
- Review fees
- Verify every detail on your Trezor screen
- Confirm the transaction physically
Transactions cannot be reversed once confirmed.
Advanced Features to Improve Security 🛠️🔏
Trezor offers additional layers of security if you want them:
1. Passphrase Feature 🧩
You can set an additional passphrase that creates a hidden wallet. If someone gets your seed phrase but not your passphrase, your assets remain safe.
2. Labeling Wallets 🏷️
Organize your addresses or wallets using optional labeling features.
3. Shamir Backup (on supported models) 🔐🔐
This allows you to split your recovery backup into multiple shares. It increases security and reduces the risk of one single point of failure.
Maintaining Long-Term Security 🕒🔐
After setup, your responsibility doesn’t end. Maintenance ensures longevity of both the device and your assets.
Tips to stay secure:
- 🔄 Periodically update firmware
- 🧊 Keep your recovery phrase protected
- 🛠️ Keep your device itself in a safe place
- 🛑 Beware of scams
- 🌐 Avoid clicking random links
- 🔍 Always verify URLs
Your Trezor will remain your safe vault as long as you use it wisely.
Common Mistakes to Avoid 🚫⚠️
Even experienced users slip up. Here’s what you must never do:
- 🛑 Never save your recovery seed online
- 🛑 Never share photos of your device or seed
- 🛑 Never trust anyone claiming to be support who asks for your seed
- 🛑 Never enter your seed into a website
- 🛑 Never buy pre-initialized hardware wallets
- 🛑 Never ignore firmware updates
Your safety depends on your caution.
Frequently Asked Questions ❓💬
What happens if my device breaks?
Use your recovery seed on a new hardware wallet to restore your funds.
Can hackers steal my crypto remotely?
Not unless they get your recovery seed. The Trezor itself doesn’t expose keys.
Do I need the internet to use the wallet?
The wallet software needs internet to broadcast transactions, but your Trezor device does not.
Can I store multiple coins?
Yes, depending on model support.
Conclusion 🌟🔐
Setting up your Trezor through this step-by-step guide gives you full control over your crypto security. Your seed phrase, your PIN, and your physical device work together to protect your digital wealth in a way online solutions simply cannot match. With your Trezor properly configured, you enjoy peace of mind, stronger protection, and independence.
Your journey into safer crypto management begins the moment you secure your device. Enjoy freedom, security, and confidence in every transaction you make. 🚀🔒💰
If you want, I can also provide: